Following on from my earlier blogs about new features included within TS2013, there is a glaring omission, tunnel occlusion which for the layman, making a tunnel darker. Many who are familiar with the program pre TS2013 will know that tunnels and in particular the darkness was not a strong feature of previous versions.
First, its worth pointing out exactly where this tool resides. In the middle left hand menu, under "misc" and called "Tunnel Occlusion Volume"
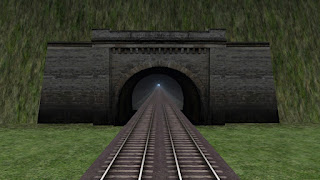
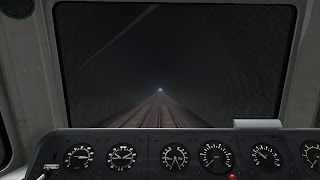
OK, the first thing we need to do for the purposes of this tutorial is create a basic tunnel (Fig 1) and with no modifications added, Fig 2 shows the view from inside the cab of a Class 47 which doesn't even have lights on and is at the mid point of a 800m tunnel. I don't think many could argue that it is far too bright in there.
 |
| Fig 1 |
|
 |
| Fig 2 |
|
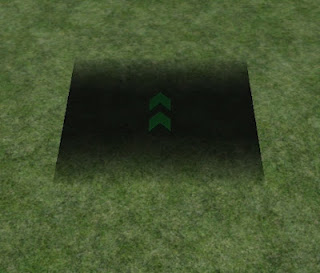
In order to now use the tool and fix this, we first have to place the tool. Fig 3 shows the tool in its placed, unselected state.
 |
| Fig 3 |
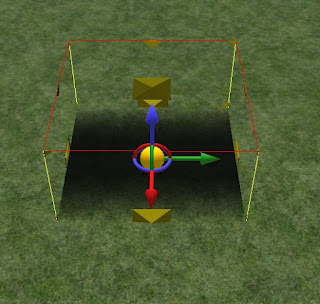
In order to select and manipulate the tool, you must click on the green coloured arrows. As you can see, this then highlights the object (Fig 4) and it is pretty similar to a decal, in that all faces have a selection point which can be manipulated in order to change the size of the tool. It's worth noting at this point that because those green arrows are fairly dark, and with the likelihood of you working in dark confined spaces, it's more ideal that you do all of your modifications before moving the sized tool into place.
 |
| Fig 4 |
As mentioned above, you can see in Fig 5 that I have done all of my modifications outside of my pre-created tunnel. Once the tool has been placed inside, it's pretty difficult (but not impossible) to find those arrows again in order to make further modifications. You can also see from the image the way the tool actually works, where the shadow is getting gradually darker as it moves towards the middle of the tool, it then obviously becomes lighter again as you reach the other end.
Although this will be entirely user specific, I have found that placing two of these in the same place gives the best effect. This is easily done by simply copy/pasting your already sized tool before placing inside, and then placing both in the same location.
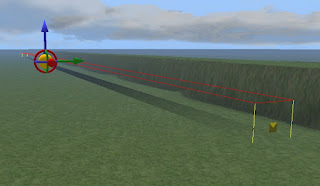 |
| Fig 5 |
|
This final shot shows the finished result once two tools have been placed. Again, taken from the Class 47 cab with no lights on, the shot is taken from exactly the same location as before. As you can see, much more darker and much more realistic.


Cool, I had no idea what it did :D
ReplyDelete