Tuesday, 25 September 2012
I'll Avoid This One!
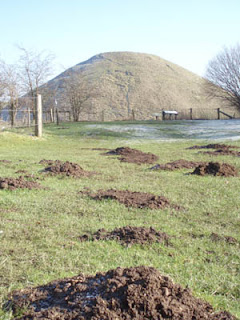
One to avoid for sure. Took this picture on the seafront last week and completely forgot to post it.


Monday, 24 September 2012
Train Simulator 2013 - Tunnel Occlusion Part 2
Following on from part 1, it turns out that tunnel occlusion is not only useful for tunnels, but it can also be used to eliminate rain from any structure. We have all seen it before, sat in a major terminus with a grand roof overhead, but that grand roof has a major leak. Using a shed as an example for this guide, you can see what I mean below, the rain penetrates the structure.

In order to eliminate this, we have to go over a few steps covered in the previous guide. If you are already familiar with the basics from the original guide, you can of course scroll down.
The tool resides in the middle left hand menu, under "misc" and called "Tunnel Occlusion Volume"

In order to now use the tool and fix the unwanted moisture, we first have to place the tool. Fig 3 shows the tool in its placed, unselected state.
In order to select and manipulate the tool, you must click on the green
coloured arrows. As you can see, this then highlights the object (Fig 4)
and it is pretty similar to a decal, in that all faces have a selection
point which can be manipulated in order to change the size of the tool.
It's worth noting at this point that because those green arrows are
fairly dark, and with the likelihood of you working in dark confined
spaces, it's more ideal that you do all of your modifications before
moving the sized tool into place.
As you can see from Fig 5, I have once again pre-sized the tool in order to fit the structure.
This does however leave us with a potentially unwanted issue, a very noticeable shadow. This can be removed by highlighting the tool, then double clicking the green arrows. This will enable the right hand flyout to appear and it presents you with some options, in this case we are interested in colours which by default will be set to black. Simply select the white colour, this will lighten the shadow considerably but will still be nocticeable and maybe not wanted. To remove it completely, changed all of the three numbered fields so they read "0.999". This can be seen below in Fig 6 which also shows the result. It's also worth noting that these shadows may not neccessarily have to be removed, depending on the structure type, but you will be able to fine tune your own shadows to suit what you want.
The result is as can be seen below (or cannot be seen clearly, you will have to trust me on it) whereby the inside of the structure now has no rain.

This tool really does have some fantastic implications, not just on the tunnels and major structures such as stations and sheds, but can also be used more or less anywhere it would be required, under bridges for instance.

In order to eliminate this, we have to go over a few steps covered in the previous guide. If you are already familiar with the basics from the original guide, you can of course scroll down.
The tool resides in the middle left hand menu, under "misc" and called "Tunnel Occlusion Volume"

In order to now use the tool and fix the unwanted moisture, we first have to place the tool. Fig 3 shows the tool in its placed, unselected state.
 |
| Fig 3 |
 | |
| Fig 4 |
As you can see from Fig 5, I have once again pre-sized the tool in order to fit the structure.
 |
| Fig 5 |
 | |
| Fig 6 |
The result is as can be seen below (or cannot be seen clearly, you will have to trust me on it) whereby the inside of the structure now has no rain.

This tool really does have some fantastic implications, not just on the tunnels and major structures such as stations and sheds, but can also be used more or less anywhere it would be required, under bridges for instance.
Train Simulator 2013 - Tunnel Occlusion Part 1
Following on from my earlier blogs about new features included within TS2013, there is a glaring omission, tunnel occlusion which for the layman, making a tunnel darker. Many who are familiar with the program pre TS2013 will know that tunnels and in particular the darkness was not a strong feature of previous versions.
First, its worth pointing out exactly where this tool resides. In the middle left hand menu, under "misc" and called "Tunnel Occlusion Volume"

OK, the first thing we need to do for the purposes of this tutorial is create a basic tunnel (Fig 1) and with no modifications added, Fig 2 shows the view from inside the cab of a Class 47 which doesn't even have lights on and is at the mid point of a 800m tunnel. I don't think many could argue that it is far too bright in there.
In order to now use the tool and fix this, we first have to place the tool. Fig 3 shows the tool in its placed, unselected state.
In order to select and manipulate the tool, you must click on the green coloured arrows. As you can see, this then highlights the object (Fig 4) and it is pretty similar to a decal, in that all faces have a selection point which can be manipulated in order to change the size of the tool. It's worth noting at this point that because those green arrows are fairly dark, and with the likelihood of you working in dark confined spaces, it's more ideal that you do all of your modifications before moving the sized tool into place.
As mentioned above, you can see in Fig 5 that I have done all of my modifications outside of my pre-created tunnel. Once the tool has been placed inside, it's pretty difficult (but not impossible) to find those arrows again in order to make further modifications. You can also see from the image the way the tool actually works, where the shadow is getting gradually darker as it moves towards the middle of the tool, it then obviously becomes lighter again as you reach the other end.
Although this will be entirely user specific, I have found that placing two of these in the same place gives the best effect. This is easily done by simply copy/pasting your already sized tool before placing inside, and then placing both in the same location.

First, its worth pointing out exactly where this tool resides. In the middle left hand menu, under "misc" and called "Tunnel Occlusion Volume"

OK, the first thing we need to do for the purposes of this tutorial is create a basic tunnel (Fig 1) and with no modifications added, Fig 2 shows the view from inside the cab of a Class 47 which doesn't even have lights on and is at the mid point of a 800m tunnel. I don't think many could argue that it is far too bright in there.
 | |
| Fig 1 |
 | |
| Fig 2 |
 |
| Fig 3 |
 |
| Fig 4 |
Although this will be entirely user specific, I have found that placing two of these in the same place gives the best effect. This is easily done by simply copy/pasting your already sized tool before placing inside, and then placing both in the same location.
 | |
| Fig 5 |
This final shot shows the finished result once two tools have been placed. Again, taken from the Class 47 cab with no lights on, the shot is taken from exactly the same location as before. As you can see, much more darker and much more realistic.

Sunday, 23 September 2012
Cresston V4 - The Work Continues
With the first open beta of Cresston V4 now available for all, I decided to concentrate on choosing the next step. As there is now a release out there and with the intention of releasing periodic updates until completion, I cannot really follow the old method of simply flying anywhere on the map and adding bits here and there, there really needed to be a plan formulated. I have decided that for the next beta update, I will concentrate on getting the Crickfield line complete, or as near to complete as possible.
If anyone has taken a look around the uncomplete parts of the route, they may well have seen the part I have been working on today near Falmore where there is a tunnel around 1 mile long. As the route is essentially fictional, DEM does become an issue so any topography around the tunnel has to be modified manually. Anyone recently visiting the area will have seen that the tunnel was just a basic strip of raised land, with two tunnel portals and little else.
This afternoon I have been working on the area with the goal of manually creating the terrain to receive a somewhat natural effect and this can be seen in the screenshots below. In addition to this, I have used the new tunnel occlusion tool to good effect in order to darken the tunnel interior, it actually does go completely pitch black the further you go in.


Friday, 21 September 2012
Cresston V4 OB v1.4 - Now Available
Please note, traffic is already really high and the download may have temporary periods of unavailability. Please bear with me and try again if this happens.I am also in the process of providing an alternative download.
The Cresston V4 v1.4 Open Beta is now available and can be downloaded from DPSimulation. The download is around 93.5mb in size.
Description
This is a beta version of Cresston V4 and is not the final, completed product. This will manifest in a number of different ways. Parts of scenery are missing and some areas are in a grubby state. In order to provide some order to the chaos, some areas will have a billboard above the track stating that this is still a WIP area. As this is a beta, some signalling, speed limits, track properties and other track related items are still missing. This has an obvious impact on scenario creation, however, it is still safe to create scenarios in most areas and any future beta releases along with the final release will not break these.
Despite the billboards stating some areas are a no go, many areas of scenery beyond these boards are actually complete and you are more than welcome to go beyond them and take a look around, much of the idea behind releasing an open beta is in order to give people the chance to take a look at what is to come.
Requirements
Cresston V4 requires WCML North and the AP Station Asset Pack, both of which are available from the Steam store. These are not optional downloads, and are integral to the route. There are no further downloads required**, everything else is included within the route package.
**This is applicable for existing users who had purchased all versions of Railworks up until Train Simulator 2012. As this route relies on much of the original asset content that was included in these original versions, any new users who only own TS2013 as of 21/09/2012 will also need the legacy Euro and US Asset Packs. These are available from Steam.
If any new users are wishing to use this route and are wondering which is the best way to move forward, and are willing to make a purchase, it's worth noting that the main requirement WCML North includes both of these asset packs at no further cost.
Scenarios
Included within OBv1.4 are three short scenarios which do not feature AI. They are there merely for the end user to have a quick drive over some of the newer sections of the
route. Two of the scenarios require the payware Class 156 DMU, available from Steam, whilst the other utilises the Intercity Swallow HST.

Cresston V4 OB v1.4 - Coming Tonight
Tonight will see the release of an "Open Beta" version of Cresston V4. Bearing in mind this is a beta and with over 200 route miles, certain areas are not fully complete. However, with the route being large, providing an open beta allows me to receive feedback on system performance, whilst also allowing the end user to take a look at how things have progressed and get a good idea of the scale of the project on final release.
The route package (around 110mb) will include all requirements thanks to permission being granted on any external references as well as the inclusion of all custom content created specifically for the route. As an end user, you are required to have both WCML North and the AP Station Asset Pack which are both available from Steam**. These are not optional requirements, they are integral to the release. You will not be required to scour the internet for external downloads in order to make the route look and run as intended.
Three simple scenarios will be included, two utilising the Class 156 DMU from Oovee, and one that uses the Intercity Swallow HST. These scenarios do not include AI, and merely provide an opportunity to drive some of the newer sections of the route.
** Existing users that owned TS2012 are not affected by original file changes. However, new users from today will require both the European and US Asset Packs, also available on Steam.
More information about the beta will be posted on this blog upon release.

Train Simulator 2013 - Hot Keys
With the release of TS2013, route builders now have various keypresses at their disposal, although some may have actually been in previous releases. :)
TAB - Align To Track
As any route builder will know, many objects need to be aligned to the track. This could be catenary, AWS ramps or things like location cabinets. Previously, things had to generally be placed in a manual fashion, with steady rotation and manipulation, a time consuming process. This new tool makes the process somewhat easier.
In the first screenshot, I am in the process of placing an AWS ramp on a curved section of track. As you can see, it is not in alignment with the curve of the track and would normally require some manipulation in order to put it in the correct position, usually after the initial placement.

We now have a new keypress at our disposal which all but eliminates this old method. After selecting your desired object that you wish to place and holding it over the track surface, simply press the TAB key and this will automatically rotate the object to align directly in the centre of the track. Then let go of the TAB key and the object will drop to ground level enabling you to make your placement.

The tool isn't by all means perfect, from what I can gather, it cannot differentiate between track directionality so in some cases will require a 180 degree rotation to make it face the other way. However, this rotation is also now easier and will be explained below.
As mentioned above, this tool is also useful for other items, in particular when placing single pieces of catenary. Again, select the item you want and hover it over the track then use the method above. This then lines it up correctly and can then be moved over to the edge of the track in one go.
Other Features
ObjectManipulation
When rotating an object, the previous features would allow you to move up/down/left/right or tilt and manipulate the object using the yellow tracking ball, the latter being particularly fiddly. In TS2013, further features are added and can be seen in the screenshot below.

As you can see, in addition to the older deatures, we now have two further methods of adjustment denoted by the red and green axis circles. These make much easier work of tilting objects on their axis.
Further to this, one way of having greater control over the manipulation of these objects was to hold down the shift key whilst making your adjustment. This made the process move much slower and allowed for fine tuning. However, when rotating an object for example, there was never an indication of degrees which in turn made it difficult to rotate an object an exact number, 90 or 180 degrees for example.
Now, when rotating an object you can use the CTRL key. This enables the object to be rotated in small increments which allows you to place objects at direct angles such as 90 or 180 degrees. An ideal solution for the situation above with the AWS ramp, where it may be facing in the opposite direction.
Further Hot Keys
Not deserving of a full section and not requiring pictures to explain, these are still highly useful and noteable.
Ground Level Camera
Ever created a route or scenario where there are dramatic changes in elevation? If so, you will know as well as I do that when moving from location to location using either the 2D map or markers that you can end up either several hundred feet above or below ground. Or maybe you are starting a route, place some DEM and end up in the centre of the earth? This then requires you to either fly up or down, not a dealbreaker of course but an unneccessary waste of time. When in one of these locations, simply press Ctrl+Shift+Home* and this then automatically adjusts the camera to ground level.
* Home is located on the right of the keyboard above the "End" key. This is not the Windows Home key.
Field Adjustment
In previous incarnations of RW/TS, when adjusting a field such as co-ordinates, brush size or brush speed, a click on the numbered field would automatically highlight the entry in blue and enable you to either delete or overwrite with your new value. In TS2013, this is not the case, however, you can now simply hold the SHIFT key before clicking the field. This will enable the field to highlight the same as before.
Train Simulator 2013 - Torch Function
Anyone who has created a night scenario will be able to sympathise with others in a similar situation. Particularly since TS2012, where more realistic weather patterns were progressively added, this resulted in a difficulty when making night based scenarios, it was too dark to see! This made it especially difficult to find consists you had placed, particularly in rural areas and it was hard to make adjustments. There were workarounds, one would be to increase the brightness on your monitor, or another would be to actually create the scenario in daylight hours, then use third party software to convert the scenario to night time along with the timings of all of your stock. Now there is no need.......
Torch Function
With the release of TS2013, we now have a torch function which enables you to, well, see in the dark. Very simple to use, this feature is enormously effective and can also aid route building at night in order to maximise the effect of placement of night lighting.
In the first screenshot below, we have a train stood in the scenario editor at night. As you can see (or can't), the train is nearly impossible to locate and even thought there is a driver icon above the train, you wouldn't know it. Imagine trying to relocate this train whilst creating a scenario!

In order to now see what is lurking in the darkness, you can use the torch function which will light up in the vicinity of where you are located.

Lo and behold, we can now see what we are doing.

Torch Function
With the release of TS2013, we now have a torch function which enables you to, well, see in the dark. Very simple to use, this feature is enormously effective and can also aid route building at night in order to maximise the effect of placement of night lighting.
In the first screenshot below, we have a train stood in the scenario editor at night. As you can see (or can't), the train is nearly impossible to locate and even thought there is a driver icon above the train, you wouldn't know it. Imagine trying to relocate this train whilst creating a scenario!

In order to now see what is lurking in the darkness, you can use the torch function which will light up in the vicinity of where you are located.
Lo and behold, we can now see what we are doing.

Train Simulator 2013 - Gradient Smoothing
Following the release of Train Simulator 2013 and with the dust settling for many, I thought it would be a good time to highlight some of the features now available for route builders. We all know about some of the fantastic improvements made with regards to optimisation of the game engine, with many seeing a quite dramatic leap in fps. However, what do we now have in the route editor? Well, quite a lot actually so we will start with the first one.........
Gradient Smoothing Tool
A feature long requested by route builders in previous versions of Railworks and TS, the gradient smoothing tool is a welcome addition which enables you to automatically smooth sections of track (and other lofts). Previously, this was done by either calculating several transitions between a gradient or the more painstaking method of splitting, manipulating and welding sections of track.
Here, we have a section of track which has been laid in two sections, one at a level gradient and the next at 1 in 45 which makes quite a severe kink in the track as can be seen. Since the advent of TS2012 and the inclusion of SuperElevation and Track Rumble, these differences in elevation are more noticeable than ever.

The new gradient smoothing tool allows us to iron out this kink and give a much more enjoyable ride. First, use the track selection tool (Fig 1) to select the track both either side (Fig 2) and through the kink in the track. Once selected, you can use the new gradient smoothing button (Fig 3) which will automatically smooth the section.
As you can see from the screenshot below, the track now has a new profile, much smoother than before. An excellent feature given how long this sort of thing would have taken to achieve in earlier versions of the program.

One further note is that this tool is not limited to track, it should work on any lofted structure whether that be roads, bridges and fences etc.
Gradient Smoothing Tool
A feature long requested by route builders in previous versions of Railworks and TS, the gradient smoothing tool is a welcome addition which enables you to automatically smooth sections of track (and other lofts). Previously, this was done by either calculating several transitions between a gradient or the more painstaking method of splitting, manipulating and welding sections of track.
Here, we have a section of track which has been laid in two sections, one at a level gradient and the next at 1 in 45 which makes quite a severe kink in the track as can be seen. Since the advent of TS2012 and the inclusion of SuperElevation and Track Rumble, these differences in elevation are more noticeable than ever.

The new gradient smoothing tool allows us to iron out this kink and give a much more enjoyable ride. First, use the track selection tool (Fig 1) to select the track both either side (Fig 2) and through the kink in the track. Once selected, you can use the new gradient smoothing button (Fig 3) which will automatically smooth the section.
 | ||
| Fig 1 |
 |
| Fig 2 |
 |
| Fig 3 |
As you can see from the screenshot below, the track now has a new profile, much smoother than before. An excellent feature given how long this sort of thing would have taken to achieve in earlier versions of the program.

One further note is that this tool is not limited to track, it should work on any lofted structure whether that be roads, bridges and fences etc.
Thursday, 20 September 2012
Impending Update - Legacy Content
With the impending update from TS2012 to TS2013 arriving later today, I thought I'd post a few thoughts on the whole process of what will happen for new users and us as existing members of the community.
There is a lot of "doomsday" talk around several forums regarding the fact that a new user will not automatically receive what we have labelled "default" or "core" content. Here are my thoughts, specifically leaving out the old routes are they are irrelevant to this piece.
There are several ways of looking at this:-
1, Shout, point and stamp your feet even though it doesn't really affect you as an existing user. Your content remains and always will, anything you have created is still available and useable. Shouting, pointing and stamping won't really achieve anything anyway.
2, Take the same view as me that absolutely nothing changes as a user. Existing users dont really see a change, all their content remains. Nothing changes for the new user as well, they are not buying a product that contains this "default". Their "default" content is effectively Sherman Hill, London to Brighton, Northeast Corridor and Isle of Wight, which handily brings me on to point 3.
3, It's actually an improvement on the existing system. Many in the community have complained about several things, one being the old assets and many routes being built using the assets, often called Identikit™ routes. Another complaint was that the IOW was not part of the default setup, and it now effectively is.
4, Look at the basic cost for a new user. At this point, TS2013 for £17.99 with the above four routes is a pretty good deal in itself. If they do want the asset packs then they will cost £3.99 each but, these asset packs are included free with a whole multitude of DLC routes anyway. Take WCML North for example, an excellent route that will appeal to many new users and it includes both of those packs as part of the purchase. For reasons such as that, I envisage that many new users who actually have an interest in buying DLC will end up with the packs as a proxy default anyway, meaning they then open the world of freeware as we currently know it.
5, Realise that despite us all having it, who are we to judge that a new user wants the 5gb+ of old content anyway? For many, it may just be an additional mess that they don't want and cannot get rid of. Having the option of getting this content only if they want it is to me, a much better prospect.

Sunday, 16 September 2012

Friday, 14 September 2012
More Scenarios Now Available!
With scenarios created by a specially selected handful of talented creators, a new "Scenarios - Third Party Creators" section of the website has been added to DPSimulation.
Initially, the scenarios included in the section are those that have been available elsewhere for download, however, several authors are now in the process of creating a whole range of new scenarios, some of which will be exclusive to DPSimulation.
The new section can be found by clicking here.
Initially, the scenarios included in the section are those that have been available elsewhere for download, however, several authors are now in the process of creating a whole range of new scenarios, some of which will be exclusive to DPSimulation.
The new section can be found by clicking here.
Monday, 10 September 2012

Friday, 7 September 2012
Another Announcement!
As if I already didn't have a lack of time on my hands these days to get anything done, this turns up............
Cue another future of sleepless nights and even more expensive Christmases. I cannot even blame it on trying to keep fit during the Olympics, seems this one was done a few weeks before. I'll blame it on the torch relay instead.....
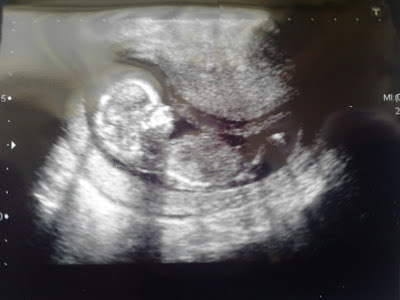
Cue another future of sleepless nights and even more expensive Christmases. I cannot even blame it on trying to keep fit during the Olympics, seems this one was done a few weeks before. I'll blame it on the torch relay instead.....

Subscribe to:
Posts (Atom)